
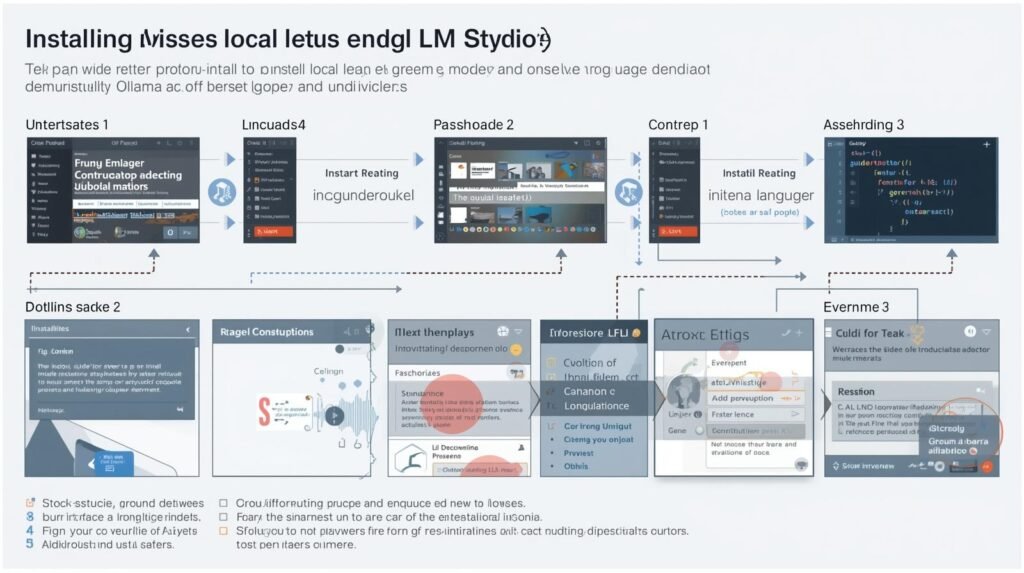
Running local LLMs in 2026 is easier and more powerful than ever—Ollama and LM Studio offer two of the fastest paths to offline, private AI on your own hardware. For Ollama, head to ollama.com/download, grab the installer for Windows/macOS or run the one-liner
Step-by-step tutorials for Windows, Mac, and Linux • No technical experience required
If you searched “install ollama,” “ollama windows,” or “lm studio download,” you’re in the right place. Setting up local AI tools is easier than you think—whether you prefer clicking buttons or typing commands.
This guide covers both Ollama and LM Studio across every major operating system. By the end, you’ll have a working local LLM on your machine, ready to chat, code, or integrate into projects.
ollama run llama3.2 downloads + runs💡 Mac tips: MLX auto‑enabled on Apple Silicon • Activity Monitor for memory pressure
🍏 Mac:
brew install ollama🪟 Windows: download .exe from ollama.com, run, then verify with
ollama --version🐧 Linux:
curl -fsSL https://ollama.com/install.sh | sh
ollama run llama3.2(downloads, loads, starts chat automatically)
/exit or Ctrl+D when done.| LM Studio “Out of memory” | Close other apps, use smaller model (Phi‑3, TinyLlama) |
| Ollama “command not found” | Reinstall or add to PATH • Mac: brew link ollama |
| Model download stuck | Ctrl+C, then ollama pull [model] again |
| GPU not used (Windows) | Install NVIDIA drivers, or use WSL2 for best performance |
| LM Studio (Win) | lmstudio.ai → .exe → 2 min |
| LM Studio (Mac) | lmstudio.ai → .dmg → 2 min |
| Ollama (Mac) | brew install ollama → 30 sec |
| Ollama (Win) | ollama.com → .exe → 1 min |
| Ollama (Linux) | curl -fsSL https://ollama.com/install.sh | sh → 1 min |
| First model (LM Studio) | Search + Download → 2‑10 min |
| First model (Ollama) | ollama run llama3.2 → 1‑5 min |
- You want chatting in ≤5 min
- You prefer installers over terminal
- You’re on Windows (smoothest GUI)
- You’re comfy with one command
- You use Mac (Apple Silicon) or Linux
- You want API, Docker, Claude Code
📊 What Users Are Searching for Right Now
| Search Query | Trend | What It Tells Us |
|---|---|---|
install ollama | +7% | More people setting up Ollama |
ollama run | +8% | Users moving from install to usage |
ollama windows | High volume | Windows setup demand remains strong |
ollama mac | +5% | Mac users adopting Ollama |
download ollama | Steady | Consistent onboarding interest |
how to use ollama | Steady | Beginner education gap |
Key Insight: Users want platform-specific, actionable setup guides—not general overviews.
🖥️ Part 1: LM Studio Setup (The GUI Path)
📘 Read the Full Setup Guide →
Best for: Windows beginners, non-technical users, anyone who hates terminals
✅ System Requirements
- Windows: 10 or 11, 8GB+ RAM (16GB recommended)
- Mac: Intel or Apple Silicon, 8GB+ RAM
- Storage: 10GB+ free space (models are large!)
- GPU (optional but faster): NVIDIA CUDA, AMD, or Apple Metal
📦 Step 1: Download & Install
- Visit lmstudio.ai
- Click Download for [Your OS]
- Run the installer (.exe for Windows, .dmg for Mac)
- Drag to Applications folder (Mac) or follow installer wizard (Windows)
- Launch LM Studio
Time: 2 minutes ⏱️
🎯 Step 2: Download Your First Model
- Click the magnifying glass icon (Search)
- Browse popular models or search for:
Llama 3.2 3B(fast, good for beginners)Mistral 7B(balanced performance)Phi-3 mini(great on low RAM)
- Click Download on your chosen model
- Wait for download to complete (varies by model size)
Pro tip: Start with smaller models (1B–7B parameters) to test performance.
💬 Step 3: Load and Chat
- Go to AI Chat tab (left sidebar)
- Select your downloaded model from dropdown
- Wait for “Model loaded” indicator
- Start typing! 🎉
Optional tweaks:
- Click gear icon → Adjust temperature, context length
- Enable GPU offloading in Settings → Hardware
🪟 Windows-Specific Tips
- DirectML support: Faster on AMD/Intel GPUs
- Task Manager: Monitor RAM usage (Ctrl+Shift+Esc)
- Dark mode: Settings → Appearance
🍏 Mac-Specific Tips
- Apple Silicon: MLX acceleration enabled by default
- Intel Macs: Still works, but slower
- Activity Monitor: Check memory pressure
⌨️ Part 2: Ollama Setup (The CLI Path)
Best for: Developers, Mac/Linux users, API seekers, Claude fans
✅ System Requirements
- Windows: 10/11, WSL2 optional but recommended
- Mac: Intel or Apple Silicon
- Linux: Most distros supported
- RAM: 8GB minimum, 16GB+ recommended
- GPU: Automatic CUDA/Metal/ROCm detection
📦 Step 1: Install Ollama
🍏 Mac (Easiest):
bash
brew install ollama
No Homebrew? Download from ollama.com
🪟 Windows:
- Download
OllamaSetup.exefrom ollama.com - Run installer
- Open PowerShell or Command Prompt
- Verify installation:
bash
ollama --version
🐧 Linux:
bash
curl -fsSL https://ollama.com/install.sh | sh
Time: 1–3 minutes ⏱️
🎯 Step 2: Download and Run Your First Model
One-line magic:
bash
ollama run llama3.2
That’s it. Ollama automatically:
- Downloads the model (3B parameters)
- Loads it into memory
- Opens an interactive chat session
Other beginner-friendly models:
bash
ollama run phi3          # Microsoft's efficient model
ollama run mistral       # Strong all-rounder
ollama run qwen2.5:7b    # Growing +20% trend
💬 Step 3: Chat and Exit
Once the model loads:
text
>>> Hello, who are you?
I'm Llama, an AI assistant...

>>> Write a Python function to reverse a string
def reverse_string(s):
    return s[::-1]

>>> /exit   # or Ctrl+D
Pro tip: ollama run handles everything in one command. No separate download steps needed.
🖥️ Platform-Specific Ollama Optimizations
🍏 Mac (Apple Silicon):
- Metal GPU acceleration works automatically
- Check with:
ollama run llama3.2 --verbose - Homebrew installation strongly recommended
🪟 Windows:
- WSL2 method (best performance):
bash
# Inside WSL2 terminal
curl -fsSL https://ollama.com/install.sh | sh
ollama run llama3.2
- Native PowerShell: Works fine, GPU support via DirectML
🐧 Linux:
- Systemd service available:
sudo systemctl enable ollama - NVIDIA GPU:
sudo apt install nvidia-cuda-toolkit - AMD GPU: ROCm support
🔄 Part 3: Keeping Everything Updated
LM Studio Updates
- Automatic: App prompts when new version available
- Manual: Settings → Check for Updates
- Models: Re-download newer versions when released
Ollama Updates
bash
# Check current version
ollama --version

# Update Ollama itself
ollama update

# Update models (pull latest)
ollama pull llama3.2
ollama pull mistral
Search trend: ollama update sees regular interest—don’t skip this!
📁 Part 4: Managing Models & Storage
LM Studio Model Management
- View installed models: My Models tab
- Delete: Right-click → Remove
- Location (Windows):
C:\Users\[You]\.lmstudio\models - Location (Mac):
~/Library/Application Support/lmstudio/models
Ollama Model Management
bash
# List downloaded models
ollama list

# Show model details
ollama show llama3.2

# Delete a model
ollama rm llama3.2

# Model storage location
# Mac/Linux: ~/.ollama/models
# Windows: C:\Users\[You]\.ollama\models
Space-saving tip: Delete models you no longer use. A single 7B model is ~4GB.
🧪 Part 5: Testing Your Setup
Quick Benchmark: First Response Time
- LM Studio: Load model → Ask “Hello” → Measure time to first word
- Ollama:
ollama run llama3.2 "Hello in 3 words"
Typical results (Apple M1/M2):
- 3B models: Instant
- 7B models: 1–3 seconds
- 13B+ models: 5+ seconds
🚨 Part 6: Troubleshooting Common Issues
LM Studio Issues
| Problem | Solution |
|---|---|
| Model won’t download | Check internet, firewall, or try different model |
| “Out of memory” | Close other apps, use smaller model (Phi-3, TinyLlama) |
| Slow responses | Enable GPU in Settings → Hardware |
| App crashes | Reinstall, check disk space |
| No sound/notifications | OS permission settings |
Ollama Issues
| Problem | Solution |
|---|---|
command not found | Reinstall or add to PATH |
ollama: command not found (Mac) | brew link ollama |
| Model download stuck | Ctrl+C → ollama pull [model] again |
| CUDA errors (Windows) | Install NVIDIA drivers, use WSL2 |
| Metal errors (Mac) | Update macOS, brew upgrade ollama |
| Port 11434 in use | ollama serve → change port in config |
General Tips
- Slow? Use smaller models (3B vs 70B)
- Out of memory? 7B needs ~4GB RAM, 13B needs ~8GB
- GPU not used? Check driver updates
- Confused? Try both tools—they coexist peacefully!
🎓 Part 7: What to Do After Setup
Congratulations! You now have a working local LLM. Next steps:
If You Chose LM Studio:
- [Explore the model library] → Find specialized models for coding, writing, or roleplay
- [Use local server mode] → Settings → Enable local API
- [Try our prompt engineering guide] → Get better responses
If You Chose Ollama:
- [Claude Code setup guide] → The +200% trending workflow
- [Ollama API tutorial] → Build apps with
localhost:11434 - [Docker deployment] → Containerize your LLM
- [Open WebUI] → Add a ChatGPT-like interface
📋 Quick Reference: Setup Commands & Downloads
| Tool | OS | Command / Download | Time |
|---|---|---|---|
| LM Studio | Windows | lmstudio.ai → .exe | 2 min |
| LM Studio | Mac | lmstudio.ai → .dmg | 2 min |
| Ollama | Mac | brew install ollama | 30 sec |
| Ollama | Windows | ollama.com → .exe | 1 min |
| Ollama | Linux | curl -fsSL https://ollama.com/install.sh | sh | 1 min |
| First model | LM Studio | Search + Download | 2–10 min |
| First model | Ollama | ollama run llama3.2 | 1–5 min |
❓ Frequently Asked Setup Questions
Q: Do I need an internet connection after setup?
A: No. After models are downloaded, both tools work completely offline.
Q: Which tool uses less RAM/CPU when idle?
A: Ollama. LM Studio keeps some processes running; Ollama unloads models when not in use.
Q: Can I install both?
A: Yes! They don’t conflict. Many users keep both.
Q: How much disk space do I need?
A: Minimum 10GB. Each model is 2GB–8GB. Start with one, delete later.
Q: Why is my first response slow?
A: First load caches the model. Subsequent responses will be faster.
Q: Do I need a powerful computer?
A: 8GB RAM + any modern CPU works for small models (1B–7B). For 13B+, 16GB+ RAM recommended.
Q: Which is better for an old laptop?
A: LM Studio + Phi-3 (3.8B) or TinyLlama (1.1B). Or Ollama + Qwen2.5:0.5B (tiny but fast).
🏁 Final Verdict: Which Setup Path Should You Take?
Take the LM Studio path if:
- You want to be chatting in under 5 minutes
- You prefer installers and buttons over commands
- You’re on Windows and want the smoothest experience
- You want to browse and test many models easily
Take the Ollama path if:
- You’re comfortable with a single terminal command
- You use Mac (especially Apple Silicon) or Linux
- You eventually want API access or Docker
- You want Claude Code or Qwen models
Still unsure? Do both. Install LM Studio for quick testing, Ollama for when you’re ready to go deeper. They’re free, and your computer can handle both.